Crafting the perfect home-based chest workout is an exciting journey toward achieving the chest definition and strength you’ve always desired. Whether you have access to a full home gym, minimal equipment, or none at all, understanding how to leverage what you have can lead to impressive results. If you’re planning a dedicated home setup, you can get started with a guide on How To Build A Home Gym? for ideas. Let’s dive into the essentials of building a big chest from home, focusing initially on the basics of chest anatomy and the pivotal roles of consistency and progression.
Understanding the Basics of Chest Anatomy
The chest is primarily composed of two muscles: the pectoralis major and the pectoralis minor. The pectoralis major is the larger of the two, covering most of the upper chest and responsible for movements such as pushing and lifting. Beneath it lies the pectoralis minor, smaller and involved in movements of the shoulder blade. Knowing these muscles’ roles illuminates the path to designing exercises that effectively target the entire chest area for balanced development. Imagine these muscles as the canvas you’re about to sculpt with precision and care, focusing your efforts on each stroke to create a masterpiece.
The Importance of Consistency and Progression
Consistency is the golden thread that weaves through the fabric of any successful workout regimen. It’s about showing up for your chest workout, rain or shine, transforming it from a mere activity into a part of your lifestyle. Equally crucial is progression—gradually increasing the intensity of your workouts. This could mean adding more reps, increasing the weights, or incorporating more challenging variations of exercises. Envision yourself on a journey, not in a race; with each step forward, you become a stronger version of yourself.
By merging the understanding of chest anatomy with a steadfast commitment to consistency and progression, you’re setting the stage for a home-based chest workout that brings tangible results. Remember, the transformation you seek begins with a single rep and grows with each new challenge you embrace.
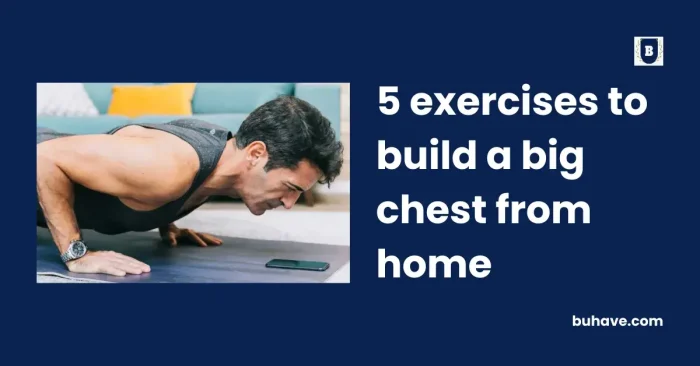
Push-Ups: The Foundation of Home Chest Training
1. Push-Ups: The Foundation of Home Chest Training
Push-ups are a cornerstone exercise for building a big chest at home. They require no equipment and can be easily modified to suit any fitness level. From the classic push-up to more advanced variations, there’s always a way to challenge your muscles and stimulate growth.
Variations for Every Level: From Beginners to Advanced
For beginners, the knee push-up is an excellent starting point. It reduces the amount of body weight you’re lifting, allowing you to focus on form and build initial strength. As you progress, transitioning to standard push-ups will provide a greater challenge by increasing the weight lifted.
Intermediate practitioners can explore the wide-grip push-up to target the chest muscles more extensively. Here, placing your hands farther apart than shoulder-width emphasizes the pectoral muscles while still engaging the triceps and shoulders.
Advanced individuals can venture into more explosive variations like the clap push-up. This plyometric move not only targets the chest but also develops power and speed by requiring a forceful push from the ground to propel your body into the air.
For those interested in incorporating these variations into their routine, advancing through push-up variations offers a roadmap to increase strength and chest size without stepping foot in a gym.
Tips to Maximize Efficiency and Avoid Common Mistakes
To get the most out of your push-ups, focusing on form is critical. Ensure your body forms a straight line from your heels to your head, avoiding sagging hips or piking up at the waist. This straight-line position engages your core, providing stability and force transfer through the body.
Another common mistake to avoid is flaring your elbows out wide. Keeping your elbows at a 45-degree angle to your body reduces stress on the shoulder joints and increases the engagement of your chest muscles.
Lastly, breathe correctly by inhaling on the way down and exhaling as you push back up. Proper breathing not only helps with muscle activation but also maintains a steady rhythm, allowing you to perform more reps over time.
By incorporating these variations and adhering to these tips, push-ups can serve as a powerful tool in your home workout arsenal, paving the way for a bigger, stronger chest.
Dumbbell Press on Floor: Maximizing Chest Activation with Minimal Equipment
2. Dumbbell Press on Floor: Maximizing Chest Activation with Minimal Equipment
Starting a chest workout regime at home doesn’t require a bench or fancy gym equipment. The floor press with dumbbells is a stellar exercise that targets your pectorals, triceps, and shoulders, ensuring you get maximum chest activation with the gear you have at hand.
Choosing the Right Weights for Your Level
Selecting the appropriate weight is critical to make the most out of the dumbbell floor press. If you’re just embarking on your fitness journey, it’s wise to start light. This approach not only familiarizes you with the movement but also helps in avoiding unnecessary strain that could sideline your progress. As you grow stronger and more confident in your form, gradually increase the weight to continue challenging your muscles and ensure continuous growth. Remember, the goal is to find a weight that allows you to complete your sets with proper form yet feels challenging in the last few reps.
For a complete approach to setting up a minimal home gym, see How To Build A Home Gym?
Techniques for Safe and Effective Execution
Executing the dumbbell floor press with precision is vital to reap the benefits of this exercise while minimizing injury risk. Begin by lying flat on your back, knees bent, feet flat on the floor, and a dumbbell in each hand. Press the dumbbells up toward the ceiling, ensuring your arms are fully extended but not locked out, and then slowly lower them back down until your upper arms gently touch the floor. The controlled movement is key here; it’s not about the speed but the quality of each rep.
Ensuring your elbows don’t flare out can enhance the exercise’s effectiveness and safeguard your shoulders from undue stress. Your elbows should make about a 45-degree angle with your body throughout the movement, focusing the workload on your chest and triceps. Engaging your core throughout the exercise will also aid in protecting your lower back and maintaining a solid, stable foundation from which to press.
For those aiming to further diversify their home chest workouts, incorporating a variety of dumbbell exercises can be beneficial. Exploring additional dumbbell chest exercises can introduce new challenges and stimuli, ensuring your muscles don’t hit a plateau and your progress continues unabated.
By carefully selecting the right weights and focusing on the precision of your technique, the dumbbell press on the floor can become a cornerstone of your home chest-building routine, proving that effective muscle growth doesn’t necessarily require a gym membership or elaborate equipment. With dedication and attention to form, you’ll be well on your way to developing a stronger, more sculpted chest.
Chair Dips: Targeting the Lower Chest at Home
3. Chair Dips: Targeting the Lower Chest at Home
Chair dips are an effective way to sculpt your lower chest, carving out that defining line that everyone seeks. They are surprisingly challenging and, when done right, can yield significant gains without stepping a foot in the gym. Let’s dive into how to perform them safely and how to amp up the challenge when you’re ready.
Proper Setup for Maximum Impact and Safety
To begin, you’ll need two sturdy chairs of the same height. Place them parallel to each other, a bit wider than shoulder-width apart. Ensure they won’t slip — placing them against a wall can provide additional stability. Now, grip the chairs’ seats with your hands, straighten your legs out in front of you, and position your heels on the edge of another sturdy surface, like a low table or a step.
Lower your body by bending your elbows until your upper arms are about parallel to the floor. The deeper you go, the more you’ll engage your lower chest. However, it’s crucial to keep your elbows pointing back and not flaring out to the sides to protect your joints. Then, press yourself back up to the starting position. Throughout the exercise, maintain a straight line from your shoulders to your heels, engaging your core to prevent your hips from sagging.
For visual guidance on setting up your chair dips, detailed instructions on performing chair dips can be easily found online.
Adjustments for Intensity: Raising the Difficulty
Once basic chair dips become less challenging, it’s time to ramp up the intensity. This can be done in several ways:
1. Elevate your feet: Place your feet on another chair or an elevated surface, increasing the weight your arms have to lift. This adjustment turns gravity into a more formidable opponent, pushing your lower chest muscles to work harder.
2. Introduce weight: For an additional challenge, you can place a weight plate on your lap or wear a weighted vest. This extra load forces your muscles to adapt and grow stronger, perfect for those looking to add serious muscle mass.
3. Slow it down: Increasing the time under tension by performing your dips more slowly can massively boost intensity. A three-second descent followed by a brief pause at the bottom before pushing back up can ignite your muscles in ways quick reps cannot.
4. One-legged variation: Lift one leg off the supporting surface while performing dips to not only add to the intensity but also engage your core further for balance. Switch legs halfway through your set to ensure balanced muscle development.
5. Add a dynamic element: For the advanced, after pushing up, try a small jump with your hands coming off the chairs before landing softly and lowering back into the next dip. This explosive movement recruits more muscle fibers and builds power in addition to strength.
Expanding your home workout arsenal with chair dips provides a pathway to not only a more prominent, well-defined chest but also enhanced upper body strength. Remember, as with any form of exercise, the key to progress lies in consistency and gradually increasing the challenge your muscles face. Happy dipping! For a complete home gym setup, see How To Build A Home Gym?
Resistance Band Flys: Crafting the Outer Chest without a Bench
4. Resistance Band Fly: Crafting the Outer Chest without a Bench
In the realm of home workouts, resistance band flys emerge as a powerful tool to chisel the outer chest without coughing up for expensive chest press machine, offering a versatility that caters to all fitness levels without the need for a bench. By focusing on the right resistance level and mastering the execution form, you can transform your chest from the comfort of your home.
Selecting the Appropriate Resistance Level
The key to unlocking the full potential of resistance band flys lies in selecting a band that challenges you without compromising form. For beginners, starting with a lighter resistance band helps in mastering the movement with ease. As you gain strength, escalate to bands with more resistance to keep the muscles under continuous tension. It’s all about finding that sweet spot where the last few reps feel challenging, yet achievable. This journey of progression fuels not only muscle growth but also the sense of accomplishment with each level cleared.
Execution and Form: Ensuring Effective Stretch and Contraction
The beauty of resistance band flys lies in their simplicity, yet the devil is in the details. Begin by anchoring the band around a sturdy object at chest level. Grasping the ends of the band, step forward to create tension. With a slight bend in your elbows, open your arms wide, focusing on stretching the chest muscles. Now, bring your hands together, envisioning you’re hugging a giant tree. This is where you ignite the contraction at the peak of the movement, engaging those outer chest muscles intensely.
Maintaining a controlled motion is paramount, taking care not to let the bands snap back quickly. It’s the resistance during both phases of the fly—stretch and contraction—that carves deep into the muscle fibers, sculpting the chest with precision. The correct form is akin to painting, where every stroke matters, etching out the details with intention and focus.
For a deeper dive into crafting the outer chest without a bench, there’s valuable information found in guidance on resistance band chest workouts, demonstrating variations and techniques to elevate your home chest training experience. How To Build A Home Gym?
Resistance band flys are not just an exercise; they are a testament to the efficiency and versatility of band-based workouts. By adjusting resistance and refining execution, these flys unveil a pathway to significant outer chest development, underscoring the power of simplicity in achieving complex fitness goals.
Plyometric Push-Ups: Incorporating Explosiveness into Chest Development
5. Plyometric Push-Ups: Incorporating Explosiveness into Chest Development
Plyometric push-ups add a burst of power training to your chest routine, challenging the muscles to exert force rapidly. They’re best introduced after you’ve established solid form with classic push-ups and have built upper-body strength.
To perform safely, start in a standard push-up position, lower your chest and then push up with enough force to lift your hands off the floor briefly. Land softly and immediately go into the next rep. Begin with a small number of repetitions and increase gradually as you gain power.
As you combine plyometric push-ups with the other movements above, maintain a focus on progression and form. This combination of strength, stability, and explosive power will contribute to a bigger, more defined chest over time.